Overview
This comment system utilizes Waline v3.15.2 as a serverless backend and Supabase (PostgreSQL) for data storage. You can enjoy a completely free comment system without the need to set up or maintain a personal server.
1. Supabase Database Configuration
1.1 Create an Organization
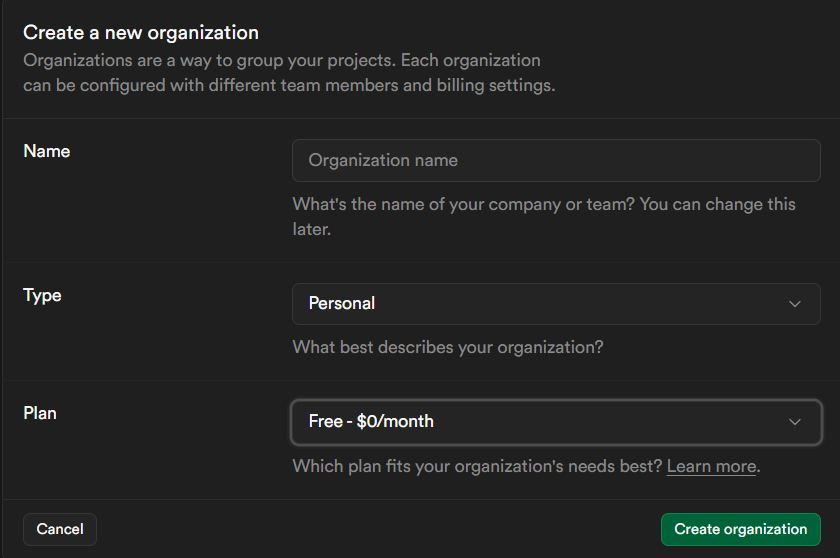
For newly registered users, a “New organization” button will appear. Click it, enter your organization name, choose “Personal” for the type, select the free plan, and click create.
1.2 Create a Project
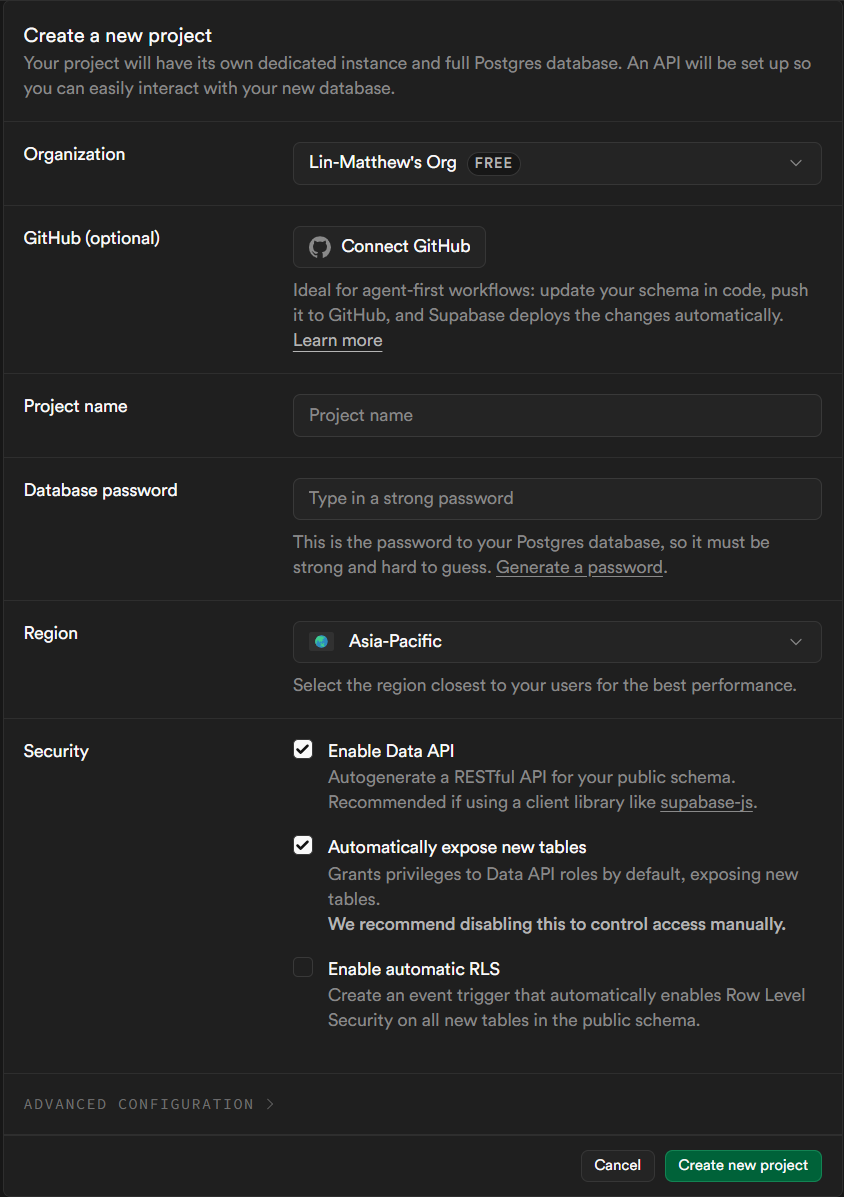
Navigate to the newly created organization and create a new project. Select your organization, enter a project name, set a database password (make sure to remember it), choose your region, and tick the two security options as shown in the screenshot. Click create project to finish.
1.3 Create Database Tables
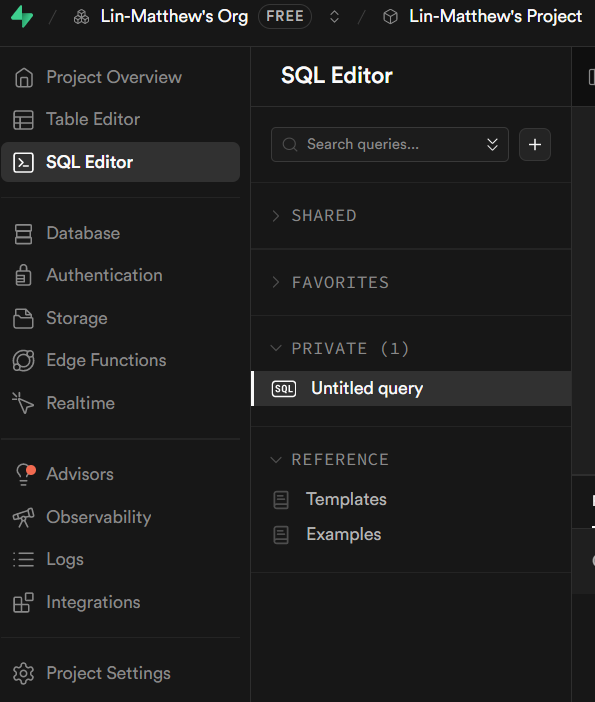
Enter your created project, select the “SQL Editor” from the sidebar, and open an “Untitled query” (click the + icon to create one if it doesn’t exist). Paste the following SQL statement to create the database tables. Note: This SQL schema is tested and optimized for the current Waline v3.15.2 version. Adjust the table fields later if your tests fail. Click “Run”, and choose “Run without RLS”. Verify that the “Results” tab outputs a success message. Alternatively, click “Table Editor” on the left sidebar to confirm that 3 tables have been successfully created: wl_comment, wl_users, and wl_counter.
-- Comment Table (wl_comment) - Strict lowercase fallback & double proofing
CREATE TABLE public.wl_comment (
    id SERIAL PRIMARY KEY,
    user_id INT DEFAULT NULL,
    pid INT DEFAULT NULL,
    rid INT DEFAULT NULL,
    url VARCHAR(255) DEFAULT NULL,
    ip VARCHAR(100) DEFAULT '',
    ua TEXT,

    comment TEXT,
    text TEXT, -- Backward compatibility for older versions

    -- Basic user attributes (all possible field names called by old/new versions)
    nick VARCHAR(255) DEFAULT NULL,
    username VARCHAR(255) DEFAULT NULL,
    mail VARCHAR(255) DEFAULT NULL,
    email VARCHAR(255) DEFAULT NULL,
    link VARCHAR(255) DEFAULT NULL,
    avatar VARCHAR(255) DEFAULT NULL,
    type VARCHAR(50) DEFAULT 'user',

    -- Status & Likes
    status VARCHAR(50) NOT NULL DEFAULT 'waiting',
    sticky INT DEFAULT 0,
    "like" INT DEFAULT 0,
    likes INT DEFAULT 0,

    -- This specific version does not use camelCase; fields like insertedAt will throw errors
    "insertedat" TIMESTAMPTZ DEFAULT CURRENT_TIMESTAMP,
    "createdat" TIMESTAMPTZ DEFAULT CURRENT_TIMESTAMP,
    "updatedat" TIMESTAMPTZ DEFAULT CURRENT_TIMESTAMP
);
CREATE INDEX IF NOT EXISTS idx_wl_comment_url ON public.wl_comment(url);

-- Counter / Page Views / Reaction Table (wl_counter)
CREATE TABLE public.wl_counter (
    id SERIAL PRIMARY KEY,
    url VARCHAR(255) NOT NULL DEFAULT '',
    time INT DEFAULT 0,

    -- Eight types of article emoji reactions
    reaction0 INT DEFAULT 0,
    reaction1 INT DEFAULT 0,
    reaction2 INT DEFAULT 0,
    reaction3 INT DEFAULT 0,
    reaction4 INT DEFAULT 0,
    reaction5 INT DEFAULT 0,
    reaction6 INT DEFAULT 0,
    reaction7 INT DEFAULT 0,
    reaction8 INT DEFAULT 0,

    "createdat" TIMESTAMPTZ DEFAULT CURRENT_TIMESTAMP,
    "updatedat" TIMESTAMPTZ DEFAULT CURRENT_TIMESTAMP
);

-- Users Table
CREATE TABLE public.wl_users (
    id SERIAL PRIMARY KEY,
    password VARCHAR(255) NOT NULL,
    type VARCHAR(50) NOT NULL DEFAULT 'user',
    label VARCHAR(255) DEFAULT NULL,
    avatar VARCHAR(255) DEFAULT NULL,

    display_name VARCHAR(255) DEFAULT '',
    nick VARCHAR(255) DEFAULT NULL,
    username VARCHAR(255) DEFAULT NULL,      -- Old version username

    email VARCHAR(255) DEFAULT '',
    mail VARCHAR(255) DEFAULT NULL,

    url VARCHAR(255) DEFAULT NULL,
    link VARCHAR(255) DEFAULT NULL,

    -- Third-party OAuth Support
    github VARCHAR(255) DEFAULT NULL,
    twitter VARCHAR(255) DEFAULT NULL,
    facebook VARCHAR(255) DEFAULT NULL,
    google VARCHAR(255) DEFAULT NULL,
    weibo VARCHAR(255) DEFAULT NULL,
    qq VARCHAR(255) DEFAULT NULL,
    oidc VARCHAR(255) DEFAULT NULL,
    "2fa" VARCHAR(32) DEFAULT NULL,

    "createdat" TIMESTAMPTZ DEFAULT CURRENT_TIMESTAMP,
    "updatedat" TIMESTAMPTZ DEFAULT CURRENT_TIMESTAMP
);
1.4 Copy Connection Credentials
Click “Project Overview”, find “Get connected”, and click “connection string”. As shown in the image, select the Transaction pooler connection method.
Scroll down, find the connection string, and copy the string on the right which looks like this:
postgresql://hidden:[YOUR-PASSWORD]@hidden:5432//postgres.xxx:[YOUR-PASSWORD]@[aws-xxx.pooler.supabase.com:6543/postgres](https://aws-xxx.pooler.supabase.com:6543/postgres)
Parse the above string and map it to the corresponding keys and values below:
- PG_HOST:
aws-xxx.pooler.supabase.com - PG_USER:
postgres.xxx - PG_DB:
postgres - PG_PASSWORD:
YOUR-PASSWORD(The database password you entered when creating the project) - PG_PORT:
6543
If you forget your password, you can reset it by navigating to “Database” -> “Settings” -> “Reset password”.
2. GitHub Settings
Create a new repository on GitHub. Name it something like waline-comment, set the visibility to Private, and initialize it with a README.
Create a new file named package.json in the root directory with the following content:
{
  "name": "waline-server",
  "version": "1.0.0",
  "main": "index.js",
  "dependencies": {
    "@waline/vercel": "latest"
  }
}
Next, create a file named vercel.json in the root directory with the following content:
{
  "version": 2,
  "rewrites": [
    { "source": "/(.*)", "destination": "/api/comment" }
  ]
}
Then, create a new folder named api/. Inside the api directory, create a file named comment.js with the following content:
const Waline = require('@waline/vercel');

module.exports = Waline({
  env: 'vercel',
  storage: 'postgresql',
  oauth: {},
  plugins: [],
});
3. Vercel Configuration
3.1 Configure Environment Variables in Vercel
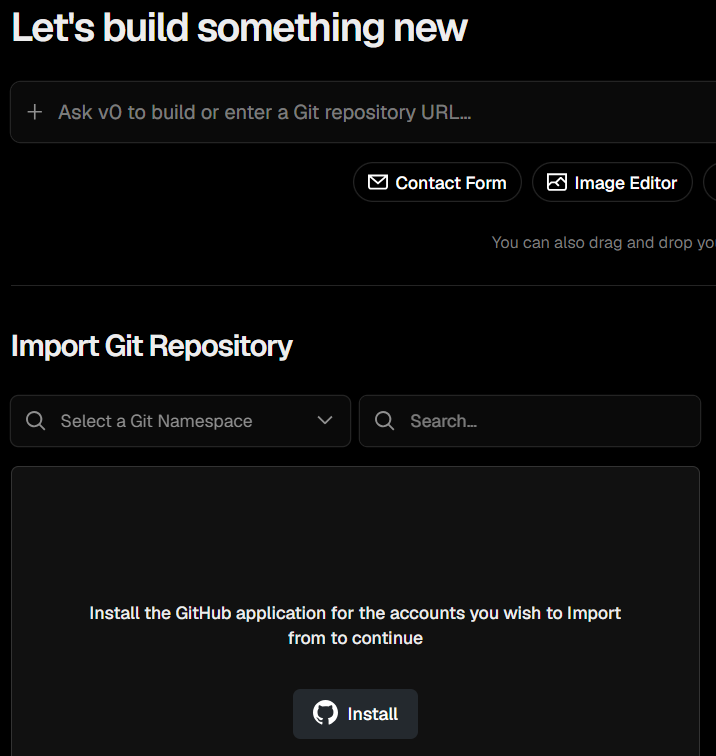
Go to the Vercel Official Website and log in with your GitHub account. From the dashboard, click to add a new project, which will bring up the interface shown below. Click “Install”. In the popup window, you can choose to grant access to all GitHub repositories or only a specific one. Here, select “Only select repositories”, pick the waline-comment repository from Step 2, click “Install”, and wait for it to finish.
Once the project is created, locate “Environment Variables” on the left sidebar and click “Add Environment Variables”. Add the 5 key-value pairs obtained from Step 1.4. Make sure there are no accidental spaces before or after the keys/values. The following screenshot shows what it looks like after adding them successfully.
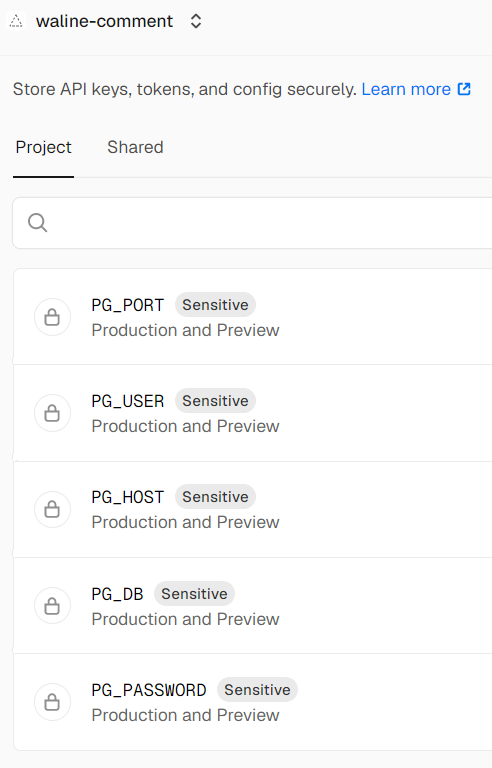
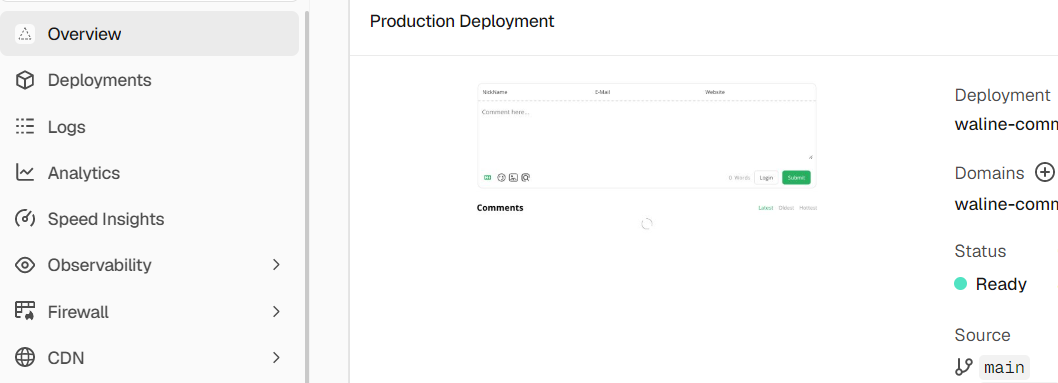
During the addition process, a notice will appear stating: “Added Environment Variable successfully. A new deployment is needed for changes to take effect.” Click Redeploy and wait for the deployment to finish (you can track the status changes on the Overview page).
As shown, when the Status turns to Ready, it means the deployment is complete and error-free. Clicking on the window preview link in the middle will load the live Waline comment testing page.
Copy the URL from the Domains section on the right; you will need this domain for your Hugo blog setup in the next step.
4. Injecting Comments into Hugo Articles
Modify your hugo.toml file. Under the [params] section, add the domain you copied from the previous step: waline_server = "https://waline-comment-xxx.vercel.app". You can now use this variable across your theme files to render the comment system.
<div id="waline"></div>
<script type="module">
  import { init } from '[https://unpkg.com/@waline/client@v3/dist/waline.js](https://unpkg.com/@waline/client@v3/dist/waline.js)';
  init({
    el: '#waline',
    serverURL: '{{ .Site.Params.waline_server }}',
    lang: 'en-US',
    dark: 'auto',
    requiredMeta: ['nick'],
  });
</script>
Since the default generated domain requires a VPN to access, you can go to Domains -> Add Existing in Vercel to add your custom domain. Then, replace waline_server with your new domain to enable access and load comments without a VPN.
You can also add or modify other configurations within the init function, such as changing the display language.
Use WeChat to scan the QR code to complete payment